
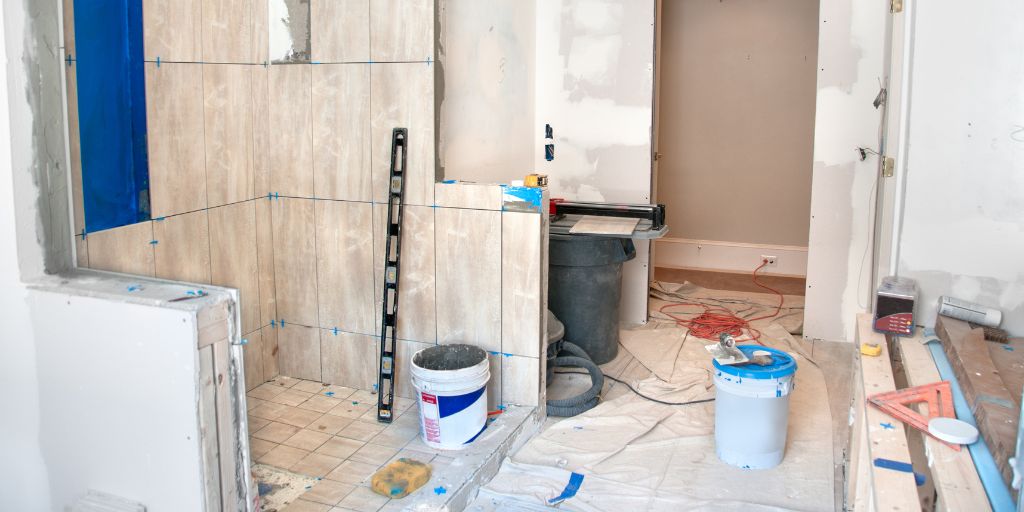
So, you’ve decided to renovate your bathroom – exciting! But now you’ve decided to remodel your bathroom you’re left with the question of what order you need to complete tasks to ensure that your bathroom renovation is a success. With so much to do it can be overwhelming, but don’t panic.
We’re bathroom renovation experts and have created this step-by-step guide to remodelling a bathroom. By following a systematic approach, you can ensure that your bathroom remodel progresses smoothly, resulting in a beautiful space that not only meets but exceeds your expectations. If you’re planning a bathroom renovation in Coventry or the surrounding area, understanding the renovation timeline can also help you know what to expect as the work progresses. While every bathroom refurb is different, the order of the work generally stays the same.
Step 1: Before you get started…
Whilst it’s easy to get swept up in the excitement of renovating your bathroom, it’s important that you keep a few things in mind before you start. Firstly, ensure you’ve picked out all fixtures and fittings decisions before starting the renovation process. This approach helps avoid delays and ensures a smooth installation, helping you on your way to a hassle-free renovation experience.
Additionally, if you opt against using a skip for waste disposal, make sure that you verify whether your chosen renovation professionals possess the requisite waste license for transporting materials. This ensures compliance with regulations and efficient waste management throughout the renovation journey.
It’s also worth thinking about your budget at this stage. The cost of a bathroom renovation can vary considerably depending on the size of the room, the products you choose and how much of the existing bathroom needs to be changed. Having your fixtures and fittings chosen early gives your bathroom fitters a much clearer idea of what needs to be installed and where.
Step 2: Demolition and removal
If you’re having a full bathroom renovation, then the first step is to clear the space of existing fixtures and surfaces. This process involves careful demolition to remove old tiles, cabinets, and fixtures while ensuring the safety of your home and any underlying plumbing or electrical systems. Proper disposal of debris is also crucial at this stage to maintain a clean and organised work environment.
If you’re doing the bathroom yourself, it’s best to check with your local skip or waste disposal company about what you can get rid of. If you’ve decided to bring in the professionals (recommended – see further down for why!), double check with your chosen bathroom remodelling company that they will remove old tiles, fixtures, etc, for you.
What can cause delays during a bathroom renovation?
Sometimes, delays come from something as simple as an assumption about a product. For example, bar showers are a popular style, with two pipes coming out of the wall and a horizontal bar connecting them. An experienced fitter will know the usual measurement between the pipes, but a new brand or model may have a slightly different centre measurement. If that isn’t spotted before the pipework is installed, you could end up needing to remove a tile or two to make an adjustment.
The same applies to concealed shower valves. If one has been recessed too far into the wall, the finished plate may not sit correctly. The fix itself might be straightforward, but going back into a finished wall takes additional time. This is where experience makes a difference. Knowing which products need to be checked before pipework is positioned can help prevent small assumptions from turning into delays further down the line.
Step 3: Pipework, electrics and plastering
Before you start installing your bathroom the room will need to be plastered, however you will need to set up some pipework and electrics before the room is plastered otherwise you will be doing some tasks twice. Once the room is plastered you can start the install of bath and shower tray.
When do plumbing and electrics need to be finalised?
Although some plumbing and electrical work is completed towards the end of a renovation, most of it needs to be in place much earlier. In theory, around 90–95% of the pipework needs to be sorted before tiling begins.
Once the tiles are on, you should generally only have the final connections left to make, such as connecting the toilet, finishing tap connections or making a short run of pipe from one point to another. The toilet waste is a good example. It needs to be positioned correctly before tiling so that the toilet pan can sit flush against the finished wall.
What happens before you see any progress?
Some of the busiest days of a bathroom renovation can be the days when it looks like nothing is happening. Mark, our lead fitter, has been with the company for 36 years and runs all of the jobs. Gary remembers a customer once asking what Mark had been doing all day because they couldn’t see much progress.
The reality was that Mark had spent the day working on pipework underneath the floorboards and inside the carcassing for fitted furniture. He was positioning everything carefully so that when the vanity unit was installed, the connections would be exactly where they needed to be. Then, the following day, the visible progress suddenly appeared.
This is a good example of why the first fix is so important. First fix is the stage where things such as concealed pipework and electrical wiring are positioned before walls, floors and other surfaces are finished. It might not look exciting, but this hidden work provides the foundations for everything that follows. Customers naturally notice the tiling, furniture and finished fittings, but they don’t see the time spent making sure everything behind them is in the right place.
Step 4: Installing the shower and bath
Once the space is cleared, it’s time to focus on the centrepiece of your bathroom – the shower and/or bath. When selecting new fixtures, consider both style and functionality to create a space that meets your needs and preferences.
Whether you opt for a luxurious soaking tub or a modern shower enclosure, proper installation is key to ensuring years of enjoyment.
Step 5: Flooring overhaul
With all of the pipework set up either prior to plastering where required and then certain items installed after plastering the floor can be prepared ready for your new floor. Bear in mind you will need to take into consideration your floor and preparation thickness when setting up your pipework.
Choosing the right material is essential for both aesthetic appeal and practicality in a high-moisture, high traffic environment. Whether you prefer the timeless elegance of stone or the durability of porcelain tile, selecting a flooring option that complements your design vision while standing up to how you intend to use your bathroom is really important.
With so many options to choose from, it can be hard to narrow down exactly what flooring is best for you which is why we’ve created the ultimate bathroom flooring guide. You can take a look at our flooring guide here. We cover everything from engineered wood to vinyl flooring, with pros, cons and a sprinkling of our own expert tips and tricks.
Step 6: Tiling
With the walls and floor prepared, the meticulous process of tiling can begin. Precision and care are very important during this stage to ensure a flawless finish that withstands the demands of daily use.
Following the tiling process, the remaining fixtures and fittings can be seamlessly installed onto or in front of the newly tiled surfaces – more on that below!
Why does the tiler get all the credit?
Tiling is often the point where a bathroom suddenly looks almost finished. Before the tiler arrives, the room can still look like a building site. A couple of days later, the difference can be huge. It’s easy to see why the tiler gets a lot of the credit for that transformation. But, as Gary points out, the tiling can only be right if all the work underneath it has been done right too.
If the pipework isn’t positioned correctly or the walls haven’t been prepared properly, the tiler can’t fix those problems with tiles. So, while tiling might be the most exciting visual stage of the renovation, it’s the earlier work that makes that transformation possible!
Step 7: Cabinets and vanity set-up
Next up, it’s time to focus on storage and organisation. Selecting the right cabinets and vanity not only maximises space but also make sure your bathroom is a practical space for everyday tasks. Consider factors such as size and material to create a useful yet stylish storage solution that meets your needs.
Step 8: Lighting enhancements
Proper lighting is essential for creating a welcoming and functional bathroom space. Whether you prefer soft, ambient lighting for relaxation or bright, task lighting for grooming, strategically placed bathroom lighting fixtures can transform the look and feel of your space. For a well-rounded space, you may want to consider incorporating a mix of overhead, vanity, and accent lighting to achieve the perfect balance of form and function.
Whatever lighting you opt for, it’s essential to make sure that it is bathroom safe as not all lighting fixtures are suited to wet/damp environments. For more help on selecting the right lights, why not take a look at our bathroom lighting guide?
Step 9: Final plumbing connections
Now is the time to ensure that all plumbing connections are correctly hooked up and functional. From taps and showerheads to toilets and drains, attention to detail at this stage is key for ensuring a smooth and hassle-free transition to your newly remodelled bathroom.
As mentioned earlier, most of the pipework should already be in place by this point. The final stage is about connecting the fixtures to the plumbing that was prepared earlier, rather than carrying out major pipework. Getting those earlier stages right is what makes these final connections much more straightforward.
Step 10: Siliconing and painting
Finally, the siliconing of the room. There will be some siliconing to be completed during the installation of some of the items before the end to make sure it all ends up watertight when finished but the finishing off will require siliconing as well. And don’t forget to let the silicone set properly before you use the room.
If you choose to leave the painting of the room until then end, now is the time to do it. Just make sure you cover items over, and you have wet wipes and paper towels at the ready for quick mop-ups!
DIY vs professional bathroom remodelling
While the allure of a DIY approach may be appealing and can seem cheaper, especially for those who have handled other renovations independently, when it comes to your bathroom renovation it’s best to call in the professionals. Even the smallest oversight or miscalculation (particularly when it comes to tasks like plumbing connections) can lead to costly repairs, water damage, and even potential safety hazards down the line.
Opting for a professional over a DIY approach offers numerous advantages, including:
Expertise: Professionals bring lots of knowledge and experience to every aspect of the renovation process, ensuring precision and attention to detail from design to execution.
Design guidance: Professionals can help translate your vision into a cohesive and functional design, maximising space and aesthetics while addressing your specific needs. For example, at Alan Heath and Sons, we can create CAD designs that give you an input and help you see what your bathroom will look like before we renovate it.
Quality: With access to premium materials and industry-leading suppliers, professionals prioritise durability, longevity, and aesthetic appeal in their work. They can even help you decide on the most appropriate materials and fixtures for your lifestyle.
Efficiency and timeliness: Using a professional will help you to minimise downtime and ensure your bathroom renovation is completed within a reasonable timescale. This is especially important if you only have one bathroom if your home.
Legal and safety compliance: Professionals ensure that all work meets building codes and regulations, safeguarding the structural integrity and safety of your home.
Peace of mind: By entrusting your renovation to professionals, you can relax knowing that your project is in capable hands.
Final thoughts
A bathroom renovation involves a lot more than choosing your favourite tiles and fittings. Getting the order right means the hidden work is completed before the visible finishing touches, helping everything come together as it should.
Ready to transform your bathroom but unsure where to start? Talk to us today and let’s create the bathroom of your dreams together!